10 Creative Ways to Use Pop’s Cajun Seasoning
Elevate your kitchen game with the bold, authentic flavors of Pop’s BBQ Pit. Our Cajun Seasoning isn’t just for backyard boils—it’s a pantry powerhouse that adds a kick to almost anything. Here are 10 ways to use it today:
1. Roasted Veggies with a Kick
Toss broccoli, bell peppers, and red onions in olive oil and a heavy dusting of Pop’s. Roast at 400°F until caramelized for a side dish that actually has some personality.
2. The Ultimate Cajun Butter Steak
Compound butter is the secret to a steakhouse-quality meal. Mix softened butter with Pop’s Cajun Seasoning and a squeeze of lemon. Let it melt over a hot ribeye for an explosion of savory flavor.
3. Zesty Cajun Shrimp
Whether you’re sautéing or grilling, shrimp cook fast and soak up spice beautifully. Dust them generously before hitting the pan for the perfect taco or pasta topper.
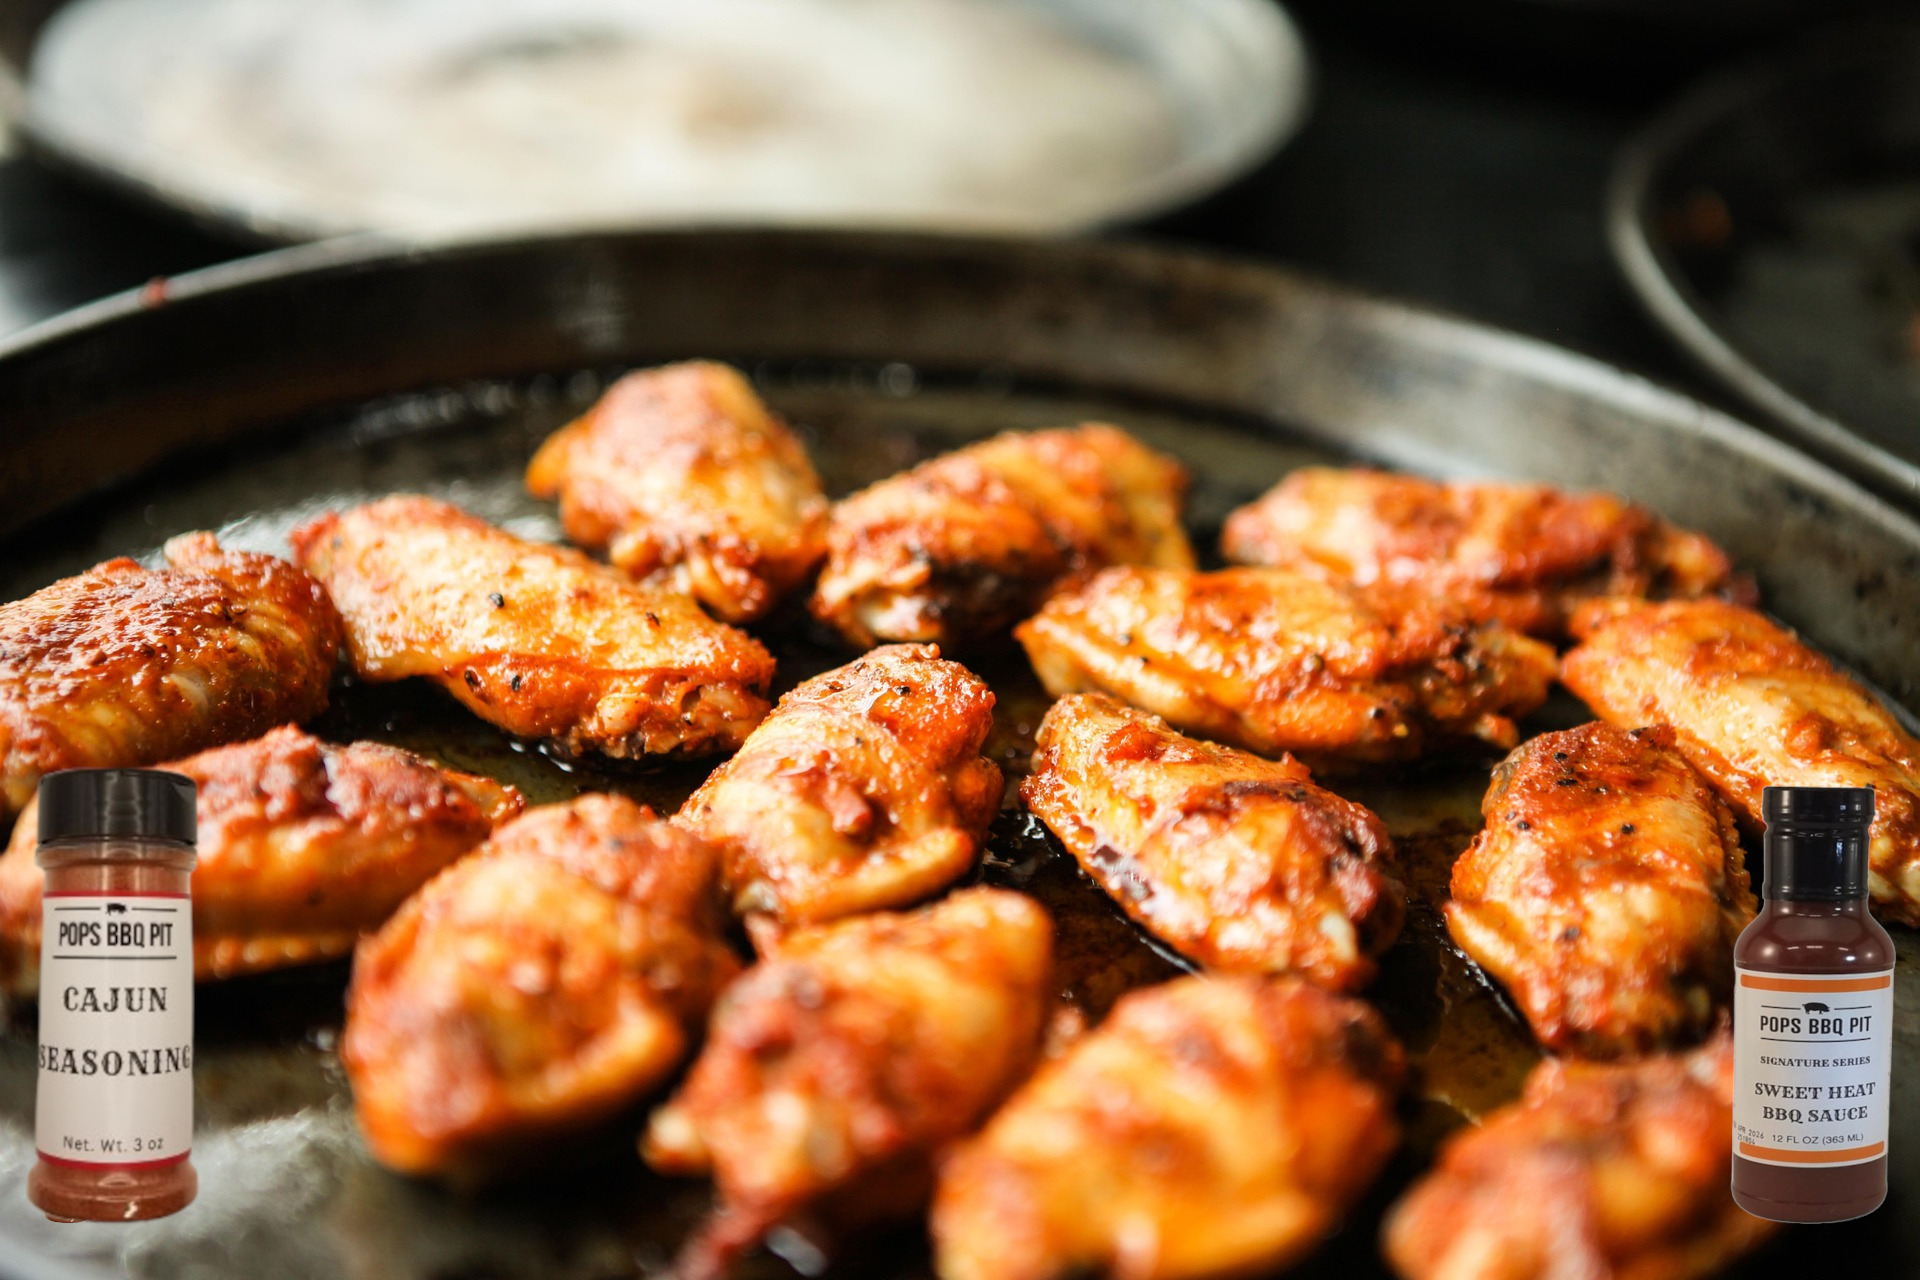
4. Crispy Cajun Chicken Wings
Forget the heavy sauces. For ultra-crispy skin with deep flavor, toss your wings in Pop’s before air-frying or baking. It provides a dry rub that packs a punch without the mess.
5. “Bayou” Movie Night Popcorn
Give your snack time a southern makeover. Drizzle fresh popcorn with melted butter and sprinkle on Pop’s Cajun Seasoning for a spicy, salty treat you won’t be able to stop eating.
6. Seasoned Sweet Potato Fries
The natural sweetness of sweet potatoes pairs perfectly with the heat of Cajun spices. Sprinkle immediately after frying or baking for that perfect sweet-and-spicy balance.
7. The Ultimate Dip Mixer
Stir a tablespoon of Pop’s into sour cream, Greek yogurt, or softened cream cheese. It makes an instant, crowd-pleasing dip for chips, crackers, or fresh veggies.
8. Avocado Toast & Egg Rimmer
Take your breakfast to the next level. A light dusting of Pop’s over a fried egg or smashed avocado toast adds depth and heat that black pepper just can’t match.
9. The Spicy Bloody Mary Rim
Ditch the plain salt. Wet the rim of your glass with a lime wedge and dip it into Pop’s Cajun Seasoning. It’s the perfect savory compliment to a morning cocktail.
10. Grilled Corn on the Cob (Street Corn Style)
Brush grilled corn with a little mayo or butter, then roll it in Pop’s Cajun Seasoning and a bit of parmesan cheese. It’s a southern twist on Mexican Elote that will be the star of your next BBQ.
Ready to spice up your kitchen? Visit popsbbqpit.com to grab your bottle and start cooking like a pro!